Showing Posts From
Touch screen
- 29 Apr, 2017
- 5 min read
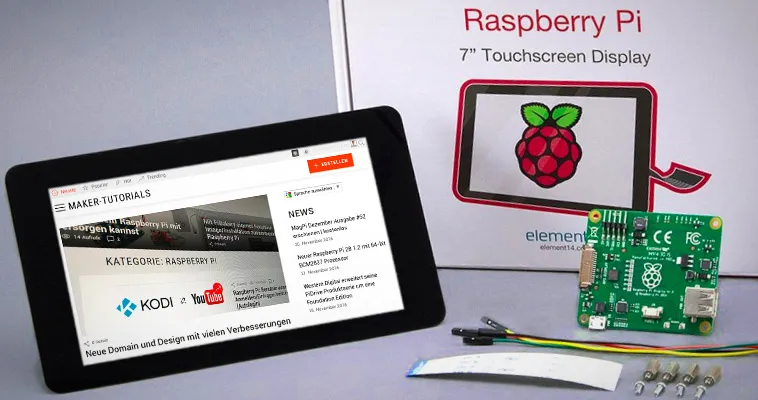
Official Raspberry Pi 7" Touch Screen LCD Display assembly guide - install and tips
This tutorial will show you how to assemble your Raspberry Pi Touchscreen, which power supply options are available and a few helpful hints. Required parts:original 7 inch LCD Touchscreen for Raspberry Pi A Raspberry Pi A+,B+, Pi 2, or Pi 3 Micro USB power adapter with a minimum of 2A Micro SD card with the most recent Raspbian, or Noobs versionContentsInstall/connect Raspberry Pi Touchscreen With the new 7 inch version the controller board is already connected to the display. You just need to connect the Raspberry Pi to the controller board.Connect the red jumper cable with the 5V pin and the black cable with GND of the touchscreen's controller board. This ways the Raspberry Pi is supplied with power through the touchscreen. Connect the flat ribbon cable (DSI) with the silverish contacts to the brown side. You can now attach the Raspberry Pi into the controller board and fix it with the screws. Attach now the red jumper cable to the GPIO pin 4 and the black cable to the GPIO pin 6. The flat ribbon cable (DSI) need to be plugged into the connector with the label "Display" (contacts to the inside). Finally you need to plug the micro usb power adapter into the controller board of the touchscreen. The setup may not be supplied with power through the Raspberry Pi as the internal fuse of the Raspberry Pi cannot handle the 400 mA that the touchscreen requires.It is possible to use the touchscreen and another screen (HDMI output) at the same time. Error Sources If the screen stays black after the start check the DSI cable (white flat ribbon cable). THE DSI connects the Raspberry Pi and the controller board of the touchscreen.Shut down the Raspberry Pi and check if the cable is connected in the correct direction. At the Raspberry Pi the silverish contacts need to point to the inside (white side of the connector). At the touch controller board the contacts need to point to the brown side of the connector.Update the operating system. sudo apt-get update && sudo apt-get dist-upgradeWhen downloading, the image can look blurry - that's normal.Alternative Power Supplies There are 3 possibilities to supply the touchscreen and the Raspberry Pi with power.Jumper Cable As described above, connect the +5V and Ground pin of the controller board of the touchscreen with the GPIO pins of the Raspberry Pi. Now the Raspberry Pi is supplied by power through the display. This variant is simple and cheap but it is impossible to attach a extention board.Y Micro USB cable You can use a micro USB Y-cable to supply both micro USB inputs at the same time. This way you can use a extension board at the Raspberry Pi requireing only one power supply.Two Power Supplies Use two micro USB poer supplies, to supply the touchscreen and the Raspberry Pi separately with power. If you use a power demanding extension board it could be required to use two power supplies. In that case the display and the Raspberry Pi need to be turned on at the same time!Rotate Image If you want to use the touchscreen in portrait mode or turned by 180° follow the steps below. I use the case from Pimoroni. For this the images needs to be rotated by 180°.Open the config.txt file with the Nano text editor. sudo nano /boot/config.txtAdd the following text at the beginning of the config.txt. lcd_rotate=2 lcd_rotate=0 Normal lcd_rotate=1 90 Degree lcd_rotate=2 180 Degree lcd_rotate=3 270 Degree lcd_rotate=0x10000 mirror horizontally lcd_rotate=0x20000 mirror verticallyQuite the editing with the shortcut ctrl+ and save the changes with y.The image should be rotated after a restart of the system. sudo rebootSet up Right Click The right click via touch needs to be set up. Two fingers for the "right mouse button" This tutorial describes how you can set up that a two-finger touch executes a right click. Long press of "right mouse button This option does not work with Raspbian Jessie.Open the file xorg.conf with the nano text editor. sudo nano /etc/X11/xorg.conf Section "InputClass" Identifier "calibration" Driver "evdev" MatchProduct "FT5406 memory based driver" Option "EmulateThirdButton" "1" Option "EmulateThirdButtonTimeout" "750" Option "EmulateThirdButtonMoveThreshold" "30" EndSection Close the editor with ctrl-x and confirm the changes with y.Restart the system sudo rebootInstall a On-Screen or Virtual Keyboard You can choose between different on-screen keyboards. I use Florence as the Matchbox keyboard has problems under Jessie and causes a constant CPU usage of 25%.Florence sudo apt-get install florence You can now activate the Florence virtual keyboard under Universal Access. In my case Florence crashed always which could be fixed after installing at-spi2-core. sudo apt-get install at-spi2-coreMatchbox Keyboard sudo apt-get install matchbox-keyboard Active the on-screen keyboard under " MENU > Accessories > Keyboard".Adjust Brightness of Backlight You can adjust the brightness of the backlight with the terminal.If you want to save power you can use the following command to adjust the brightness. sudo sh -c "echo 'Value of Brightness' >> /sys/class/backlight/rpi_backlight/brightness"Replace Value of Brightness with a number between 0 and 255. At 0 the backlight is off and at 255 the brightest value is achieved. Hide mouse poniter As descibed in the tutorial "Midori Browser in Fullscreen Mode" you can install the application unclutter to hide the mouse pointer. sudo apt-get install unclutterUnclutter starts automatically after a system start. The mouse pointer should disappear automatically after 1-2 seconds. Technical DataCompatible with Raspberry Pi A+, B+, 2 & 3 17,8 cm (7") touch display, capacitive Dimensions (LxWxH): 192.96 x 112.76mm Visible Area: 154.08 x 85.92mm Resolution: 800 x 480 Pixel Contrast: 500 Brightness: 250 cd/m2 24 bit Colours 10 Finger multi touch display Bachlight adjustable via PWM Backlight lifetime of 20000 hours Operation temperature: -20°C bis +70°C Storage temperature: -30°C bis +80°C Viewing angle: upper (50), lower (70), right (70), left (70)A technical drawing with detailled dimensions can be found here.
- 29 Apr, 2017
- 2 min read
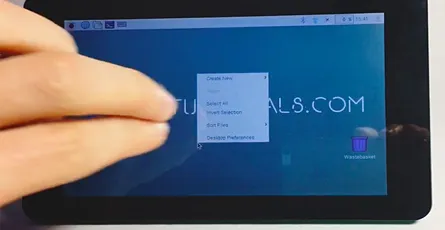
Raspberry Ri Touch Screen setup right click with twofing - Raspbian Jessie
Unfortunately, the Raspberry Pi 7 Touchscreen does not support right-click or long touch if used with Raspbian Jessie. You can add this functionality by using a two-finger touch on the Touchscreen with the program Twofing.Contents Install TwofingYou need a few programs in order to compile Twofing. In case one of those programs is already installed apt-get will automatically recognize this.sudo apt-get update && sudo apt-get install build-essential libx11-dev libxtst-dev libxi-dev x11proto-randr-dev libxrandr-devDownload Twofing. wget http://plippo.de/dwl/twofing/twofing-0.1.2.tar.gzExtract the downloaded file. tar -xvzf twofing-0.1.2.tar.gzNavigate to the folder that was created during the extraction. cd twofing-0.1.2Start the compilation and install Twofing make && sudo make installOptional I used an original Raspberry Pi 7 Touchscreen with Raspberry Jessie and an error occured during the first start of Twofing.twofing, the two-fingered daemon Version 0.1.2.20120708/dev/twofingtouch: No such file or directory You can fix the error as following. Open the 70-touchscreen-egalax.rules file with the nano text editor. sudo nano /etc/udev/rules.d/70-touchscreen-egalax.rules Delete the complete content and add the following lines.KERNEL=="event*",ATTRS{name}=="FT5406 memory based driver",SYMLINK+="twofingtouch",RUN+="/bin/chmod a+r /dev/twofingtouch" Exit the text editor with CTRL+X and confirm the changes with YRestart the Raspberry Pi. sudo rebootDelete the obsolete folder of Twofing in the home folder. rm ~/twofing-0.1.2Start Twofing in debug mode and test with two fingers if the right-click works on the Touchscreen. twofing --debug You can exit the program with CTRL+C. When running the command through SSH and not directly on the Raspberry Pi, the command twofing --debug will not work. You must first set that Twofing uses the Touchscreen. Therefore, add the following command export DISPLAY=:0 and restart Twofing afterwards. twofing --debug In case you connected an additional monitor through HDMI you need to check the index number of the Touchscreen. You can get the index numbers of all connected monitors using who. Source: http://raspberrypi.stackexchange.com/a/27881/14517Twofing autostart In order to not start Twofing after a restart manually you can add a autostart file.Navigate to the autostart folder of your home folder. cd ~/.config/autostartCreate a file with the name twofing.desktop and open it. nano twofing.desktopAdd the following text to the file.[Desktop Entry] Type=Application Name=Twofing Exec=twofing StartupNotify=false Exit the text editor with CTRL+X and confirm the changes with Y