Showing Posts From
Browser
- 22 Apr, 2017
- 3 min read
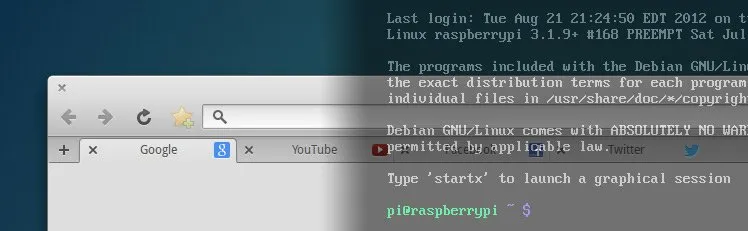
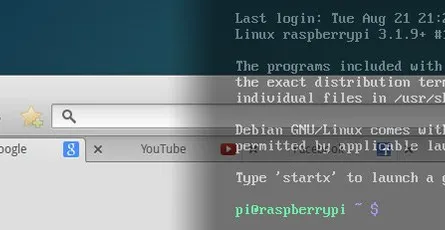
Auto start Midori Browser in Fullscreen Kiosk Modus - Raspberry Pi Linux
I will show you in this tutorial how to start the Midori Browser in full screen mode (kiosk mode) automatically after the Raspberry booted. The graphical shell (desktop) of Rapsian will not be required or started. A pratical applicaton of this would be, for example, an info monitor on an exhibition. In this project, I want to realise a small contol center for FHEM. Therefore, a PiTFT with capacitive touch screen will be used. This, however, is covered in a later tutorial.This tutorial assumes that the Raspberyy Pi or Debian Linux computer starts in terminal/console mode and not in desktop mode loading the graphical shell. Contents Midori Full Screen AutostartRun the following command with the console to update the package list. After that the Midori browser and matchbox will be installed. sudo apt-get update && sudo apt-get install -y midori matchboxCreate a new shell script file with the name_startMidori.sh_ in the home folder and open the Nano text editor. Name and save location can be chosen as you like. nano startMidori.shAdd the following code and exit the Nano text editor ctr+x. To save the changes press Y and Enter.#!/bin/sh xset -dpms # disable DPMS (Energy Star) features. xset s off # disable screen saver xset s noblank # don't blank the video device matchbox-window-manager & midori -e Fullscreen -a https://wordpress-x0o8gcg88www8k084ks8k088.c.benroe.deMake the script excecutable. sudo chmod +x startMidori.shYou can test the script if you run the following command. sudo xinit ./startMidori.sh You can exit the Midori browser with the key combinationCTRL + ALT + F1. In case you called the scriped via SSH, you can exit the script via CTRL + c.In order to automatically excecute the script when the Raspberry starts we need to edit the rc.local file. This script is excecuted when the Raspberry starts. sudo nano /etc/rc.local Add the following code before exit 0. For HDMI: sudo xinit /home/pi/startMidori.sh & For PiTFT: FRAMEBUFFER=/dev/fb1 xinit /home/pi/startMidori.sh & The & at the end is important that the subsequent lines are excecuted. You can run the script with a time delay if you sourround the command in brackets and preprend /bin/sleep 10 && schreibst. The 10 means a delay of 10 seconds. (/bin/sleep 10 && xinit /home/pi/startMidori.sh) &Unfortunately, the system needs to sign in automatically to be able to run the script. You can set this up easily if you use Raspbian Jessie using sudo raspi-config and the selecting Console Autologin under boot options. You need to use the following command to the console if you use and older Raspbian version. sudo nano /etc/inittab Search the following line 1:2345:respawn:/sbin/getty 115200 tty1 and comment it with #. #1:2345:respawn:/sbin/getty 115200 tty1 After this line add the following command. 1:2345:respawn:/bin/login -f pi tty1 /dev/tty1 2>&1 This line enables that the user pi logs in without authentication.Now you just need to restart the Raspberry pi … sudo reboot … and the Midori browser should open with the desired webpage in full screen mode. You will exit the Midori Browser using CTRL + ALT + F1.Optional: Rotate screen If you want to show the screen in vertical mode or rotate by 180 degrees you can set this up using the following steps.Open the config.txt file with the Nano editor sudo nano /boot/config.txtAdd the following test at the beginning of the config.txt file. display_rotate=2 display_rotate=0 Normal display_rotate=1 90 degrees display_rotate=2 180 degrees display_rotate=3 270 degrees display_rotate=0x10000 Mirror horizontal display_rotate=0x20000 Mirror verticalExit the editing with the shortcut ctrl+x and save the changes with y.After a restart the screen will be shown rotated as you wanted. sudo rebootOptional: Hide mouse pointerInstall the program unclutter. sudo apt-get install unclutterAdd unclutter & to the startMidori.sh script. sudo nano startMidori.sh#!/bin/sh xset -dpms # disable DPMS (Energy Star) features. xset s off # disable screen saver xset s noblank # don't blank the video device unclutter & matchbox-window-manager & midori -e Fullscreen -a https://wordpress-x0o8gcg88www8k084ks8k088.c.benroe.deA detailed article about "[Raspberry Pi: Run Applications at System Start](http://Raspberry Pi: Programme beim Systemstart ausführen)"
- 08 Jan, 2017
- 3 Min. Lesezeit
Autostart Midori Browser im Vollbild Modus (Kiosk Mode) via Konsole ohne Desktop
In diesem Tutorial zeige ich euch, wir ihr automatisch den Midori Browser im Vollbild (Kiosk Mode) startet nach dem der Raspberry hochgefahren ist. Die grafische Oberfläche (Desktop) von Raspbian wird nicht benötigt oder gestartet. Eine praktische Anwendung wäre zum Beispiel ein Info-Monitor auf einer Ausstellung. Ich möchte damit eine kleine Steuerzentrale für FHEM realisieren. Dafür werde ich eine PiTFT mit kapazitivem Touchscreen verwenden. Dazu aber in einem späterem Tutorial. Update: 8.01.2017 Bild drehen hinzugefügt Update: 17.09.2016 Zeitverzögerung in Schritt 6 hinzugefügtDas Tutorial setzt voraus das der Raspberry Pi bzw. Debian Linux Rechner im Terminal/Konsole Modus startet und nicht die Desktop Oberfläche lädt. Inhalt Midori Vollbild AutostartGebt folgenden Befehl in die Konsole ein um die Paketliste zu aktualisieren. Danach wird der Midori Browser und matchbox installiert. sudo apt-get update && sudo apt-get install -y midori matchboxErstellt eine neue Shell Script Datei mit dem Namen startMidori.sh im Home Verzeichnis und öffnet den Nano Texteditor. Name und Speicherort sind frei wählbar. nano startMidori.shFügt folgenden Code ein und beendet den Nano Texteditor mit ctr+x. Um die Änderung zu speichern Y und Enter drücken.#!/bin/sh xset -dpms # disable DPMS (Energy Star) features. xset s off # disable screen saver xset s noblank # don't blank the video device matchbox-window-manager & midori -e Fullscreen -a http://www.benjaminroesner.com/blogMacht das Script ausführbar. sudo chmod +x startMidori.shIhr könnt das Skript testen indem ihr folgenden Befehl ausführt. sudo xinit ./startMidori.sh Mit der Tastenkombination CTRL + ALT + F1 beendet ihr den Midori Browser. Falls ihr das Script über SSH aufgerufen habt, könnt ihr es mit CTRL + c beenden.Damit das Script beim Start des Raspberry ausgeführt wird, öffnen wir die rc.local Datei. Dieses Skript wird beim hochfahren des Raspberry ausgeführt. sudo nano /etc/rc.local Fügt folgenden Code vor exit 0 ein. Für HDMI: sudo xinit /home/pi/startMidori.sh & Für PiTFT: FRAMEBUFFER=/dev/fb1 xinit /home/pi/startMidori.sh & Das & am Ende ist wichtig, damit die nachfolgenden Einträge ausgeführt werden. Du kannst das Script auch zeitverzögert starten lassen, in dem du den Befehl in Klammern setzt und davor /bin/sleep 10 && schreibst. Die 10 Bedeutet 10 Sekunden Verzögerung. (/bin/sleep 10 && xinit /home/pi/startMidori.sh) &Leider muss sich das System automatisch anmelden, damit das Skript ausgeführt werden kann. Wenn du Raspbian Jessie verwendest kannst du das ganz einfach einstellen mit sudo raspi-config. Dann unter Boot Options Console Autologin wählen. Verwendest du eine ältere Raspbian Version gib folgenden Befehl in die Konsole ein. sudo nano /etc/inittab Such nach dieser Zeile 1:2345:respawn:/sbin/getty 115200 tty1 und kommentiert diese mit # aus. #1:2345:respawn:/sbin/getty 115200 tty1 Nach der Zeile fügt ihr folgenden Text ein. 1:2345:respawn:/bin/login -f pi tty1 /dev/tty1 2>&1 Die Zeile bewirkt das der Benutzer pi ohne Authentifizierung angemeldet wird.Jetzt müßt ihr nen Raspberry Pi nur noch neu starten … sudo reboot … und der Midori Browser sollte sich mit der gewünschten Seite im Vollbildmodus öffnen. Mit der Tastenkombination CTRL + ALT + F1 beendet ihr den Midori Browser.Optional: Bild drehen Möchtest du das Bild im Hochformat, oder um 180 Grad gedreht verwenden, führe folgende Schritte aus.Öffne die config.txt Datei mit dem Nano Editor sudo nano /boot/config.txtFüge folgenden Text am Anfang der config.txt Datei ein. display_rotate=2 display_rotate=0 Normal display_rotate=1 90 Grad display_rotate=2 180 Grad display_rotate=3 270 Grad display_rotate=0x10000 horizontal spiegeln display_rotate=0x20000 vertikal spiegelnBeende die Eingabe mit dem Shortcut ctrl+x und speichere die Änderung mit y.Nach einem Neustart sollte das Bild gedreht angezeigt werden. sudo rebootOptional: Mauszeiger ausblendenInstalliert das Programm unclutter. sudo apt-get install unclutterFügt dem startMidori.sh Skript unclutter & hinzu. sudo nano startMidori.sh#!/bin/sh xset -dpms # disable DPMS (Energy Star) features. xset s off # disable screen saver xset s noblank # don't blank the video device unclutter & matchbox-window-manager & midori -e Fullscreen -a https://wordpress-x0o8gcg88www8k084ks8k088.c.benroe.deausführlichen Artikel über "[Raspberry Pi: Programme beim Systemstart ausführen](http://Raspberry Pi: Programme beim Systemstart ausführen)"