You climbed on top of one of the highest moutains and want to make a small 3D model of the landscape?
Such a minature mountain is a nice gift for climbers, skier or a memory of a beautiful moment.
In this tutorial you will learn how you can print a minature landscape with a 3D printer and what you need to take care of.
Tombola
You can win 1 of 3 3D printed model of the landscape or mountain of your choice with the size of 10 cm by 10 cm.
Share this article pubicly on Facebook (until 22.10.2017) and write the area for the model and the link into the comment section below the article.
Free shipping only to Germany.
Buy Minature Landscape or Mountain
If you do not have the possibility to print the model yourself I can happily provide you an offer (invoice including VAT).
You can send inquiries via email or through the contact form.
Models up to 23 cm width and length are possible.
Contents
-
What is a Topographic Map?
A topographic map is a map that is used to display exactly the landform (topography) and other visible details of the earth’s surface. The landform is usually shown with contour lines which are completed with prominent spoit heights, such as peaks or summits, as well as the route of waters.
-
How to Create a STL 3D Printing File from Google’s Topographic Map?
Option 1: Terrain2STL
- Free
- Quick and simple
- Crashes sometimes while using large areas
- No preview of the STL file
- Only rectangular selections can be created
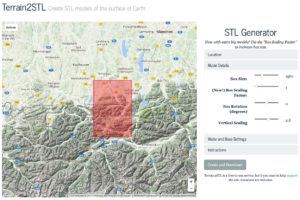 The simplest way to create a STL file from a topographic map is to use the website Terrain2STL.
- Search the desired area via drag&drop on the google map.
- Click on “Center to View” under Location. A red square will be shown in the middle of the map. This is the area that will be used for the 3D model.
- You can fine tune the details of the 3D model to the map in the section “Model Details”.
Box Size: Size of the marked area
Box Scaling Factor: The marked are can be increased with this option, however, details in the 3D model will be reduced
Box Rotation: The marked area can be rotated
Vertical Scaling: Higher values increase the differences in heights in the 3D modelThe height of the ground can be set in the section “Water and Base Settings” -> “Base Height”.
Problems with Terrain2STL
Unfortunately, the area for the model cannot be adjusted in wigth or height. If so, one could make a elongated map. An option would be to use a program such as Meshmixer to adjust the model to your own wishes and needs.
During the generation of large models, Terrain2STL crashed sometimes.
Nevertheless, the page is helpful and free of charge. You can support the developer here.Option 2: Sightline Maps
- Free
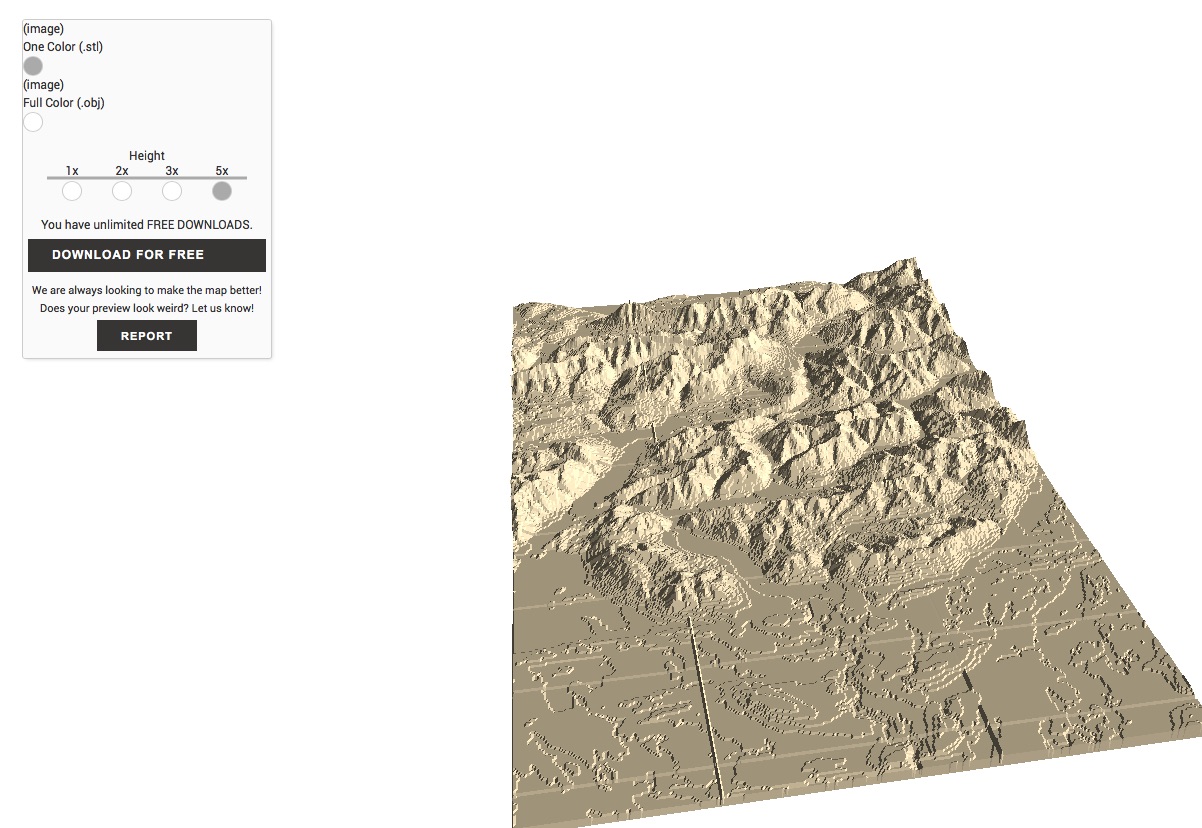
- Preview of the 3D model in the browser
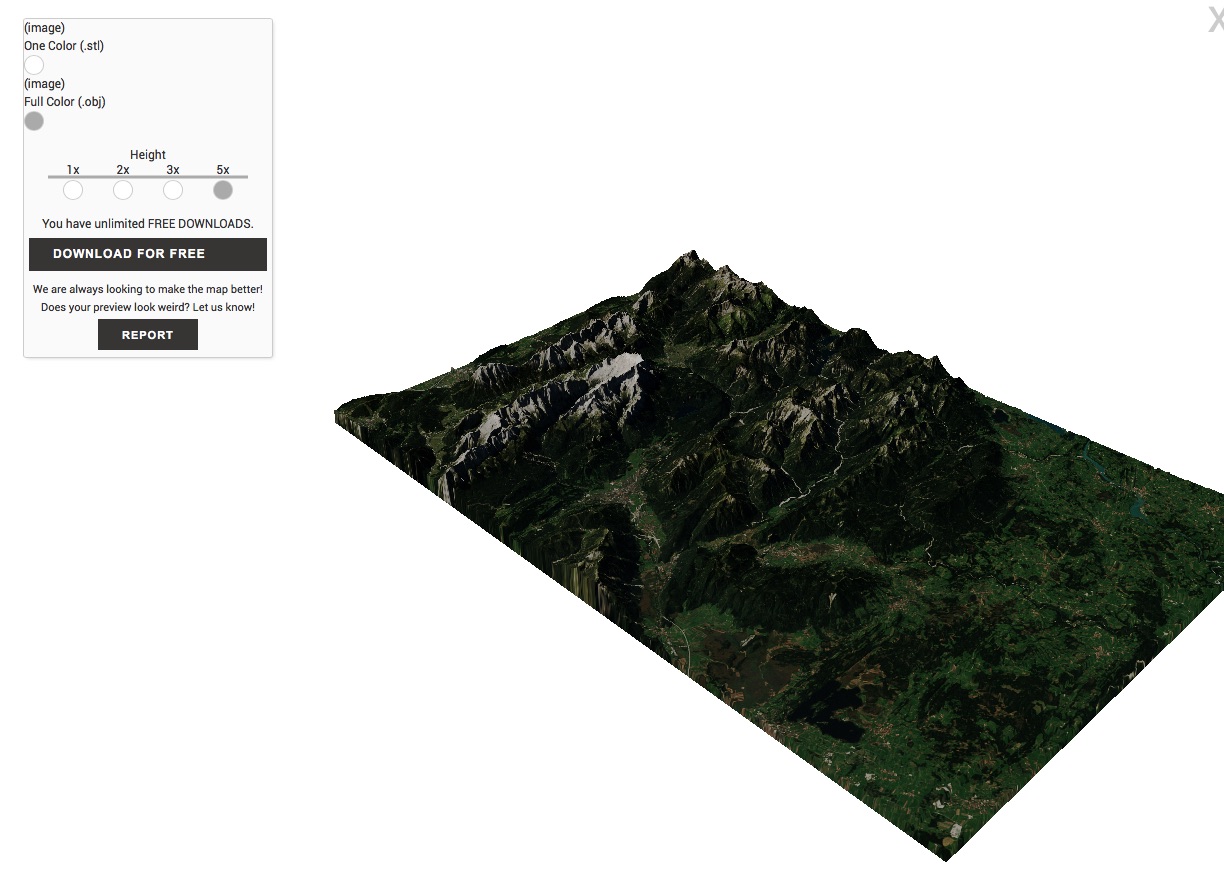
- Colored 3D model (OBJ-Datei) will be exported
- STL file is too detailed an can be, depending of the selection, several GB large
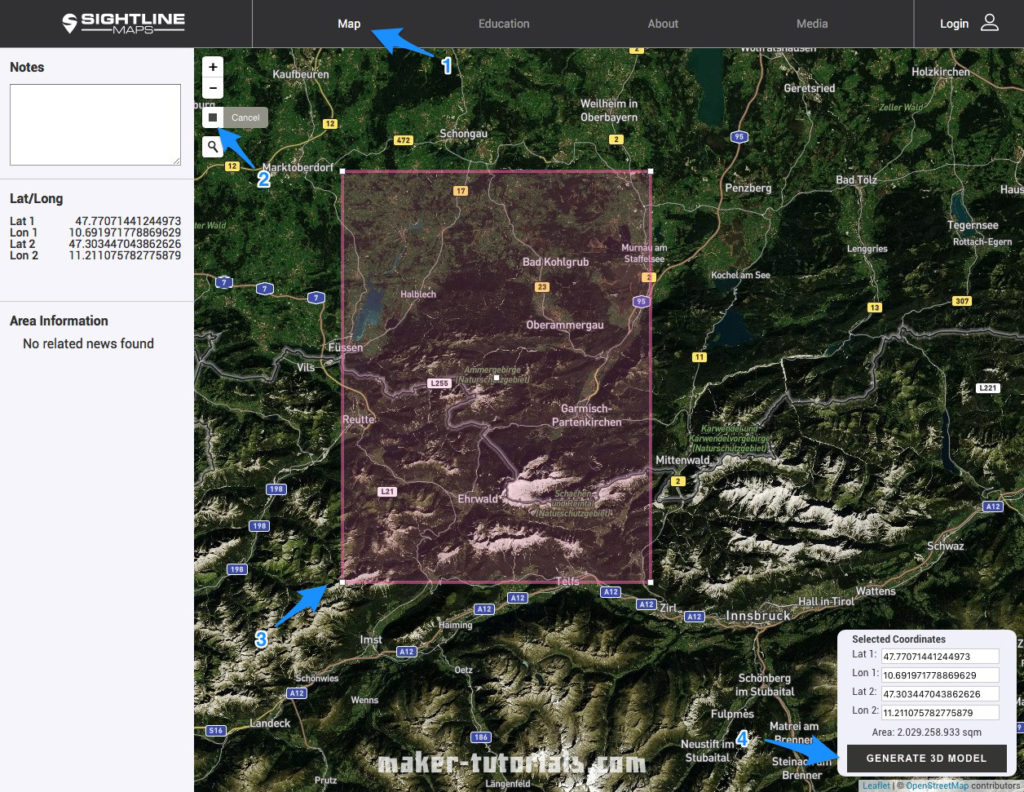
You can create the STL file on the website sightlinemaps.com
The service is free, you only need to register with your email.
In the following image all 4 steps are marked that are required to create a topographic STL file.
The scale of the height can be adjusted on the next page.
Download the single colour STL file for normal FDM and SLA printer.
With the OBJ file you can create a coloured 3D print or use the topographic model in a 3D software.
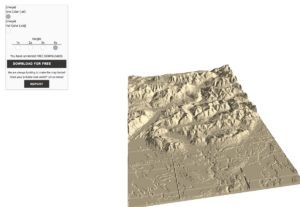

You will receive the Download link via email within 5 to 10 minutes. -
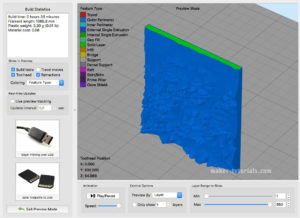
3D Print a Topographic Map with the Vase-Mode
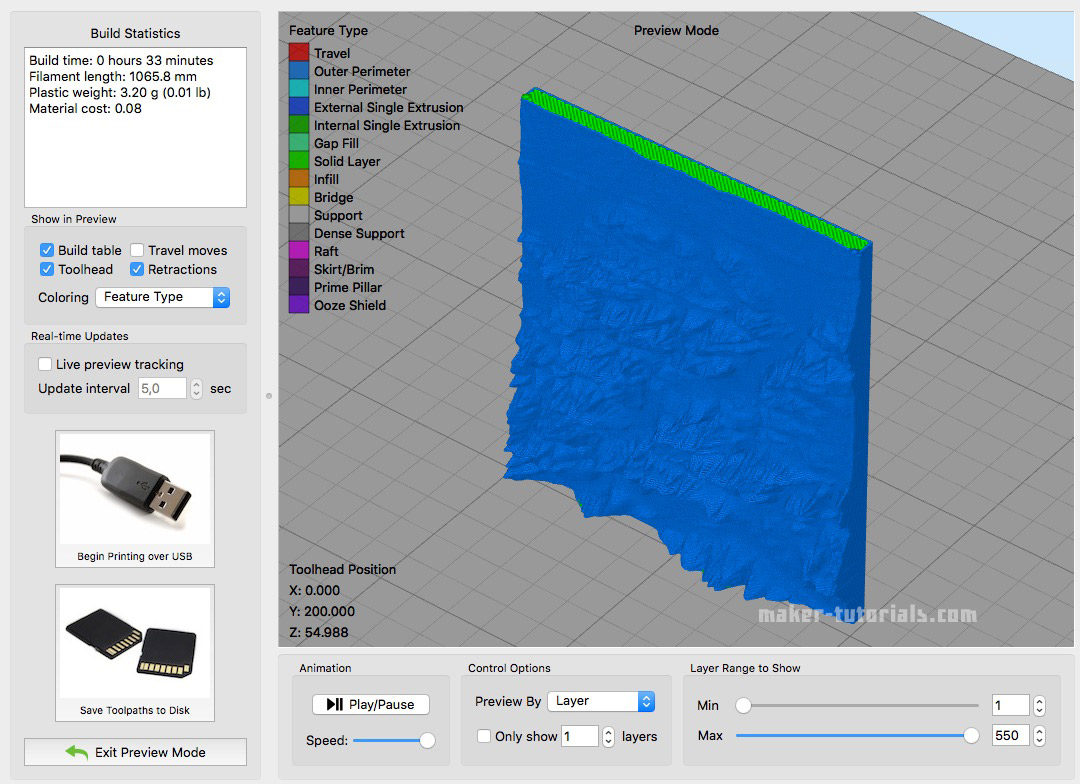
Why print the topographic map with the vase-mode?
The main reason is that the printing time is reduced by almost the half and there will be no blobs at the end of the layers.Vase-Mode: 33 minures
Normal: 52min (without Infill)When you print the model in the vase-mode, you need to align it vertically. This way, the details will be printed best (left image).
In case you have problems during as your model falls over use a raft.
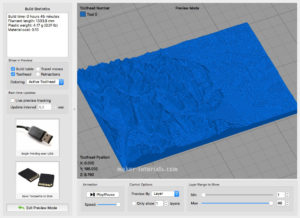
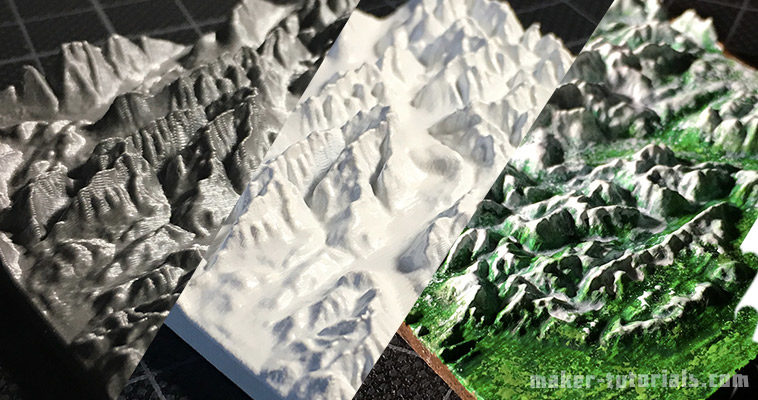
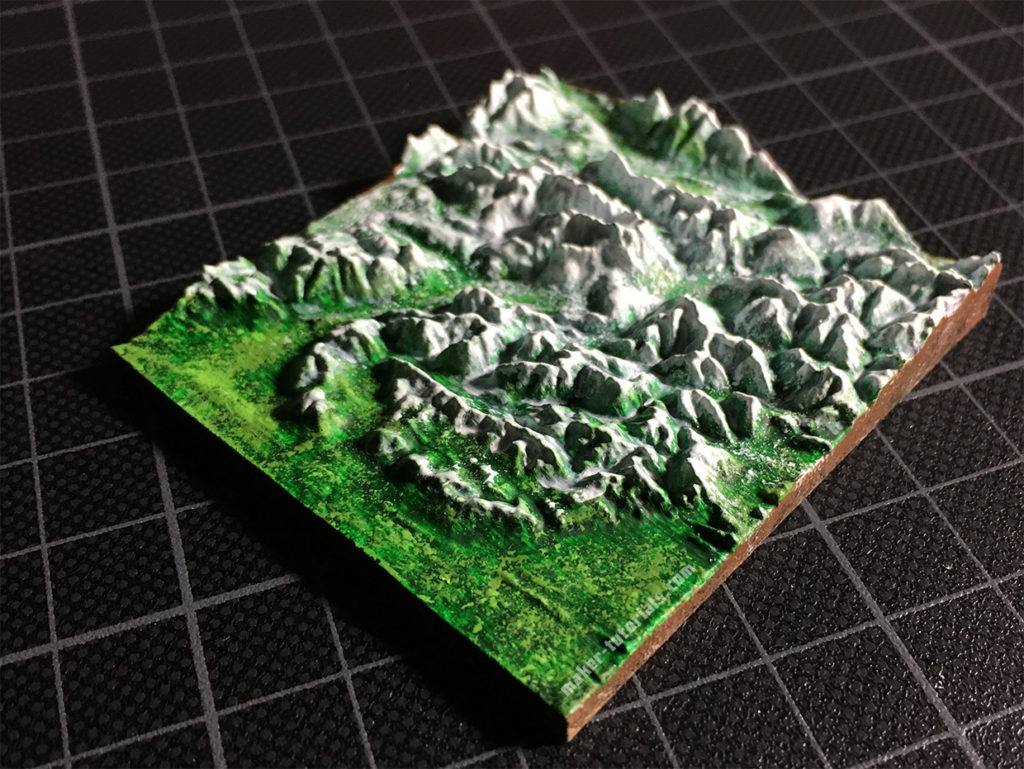
3D model of the Zugspitze, 5.5 cm x 6 cm x 0.8 cm, 50 min print duration, 0.1mm Layer height, Prusa i3 MK2 printer
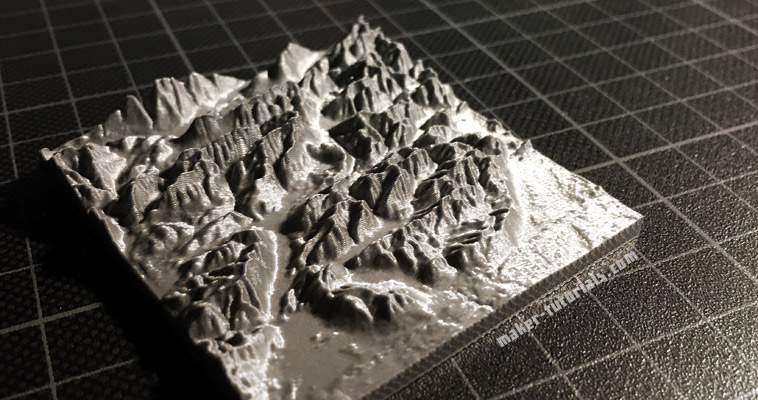
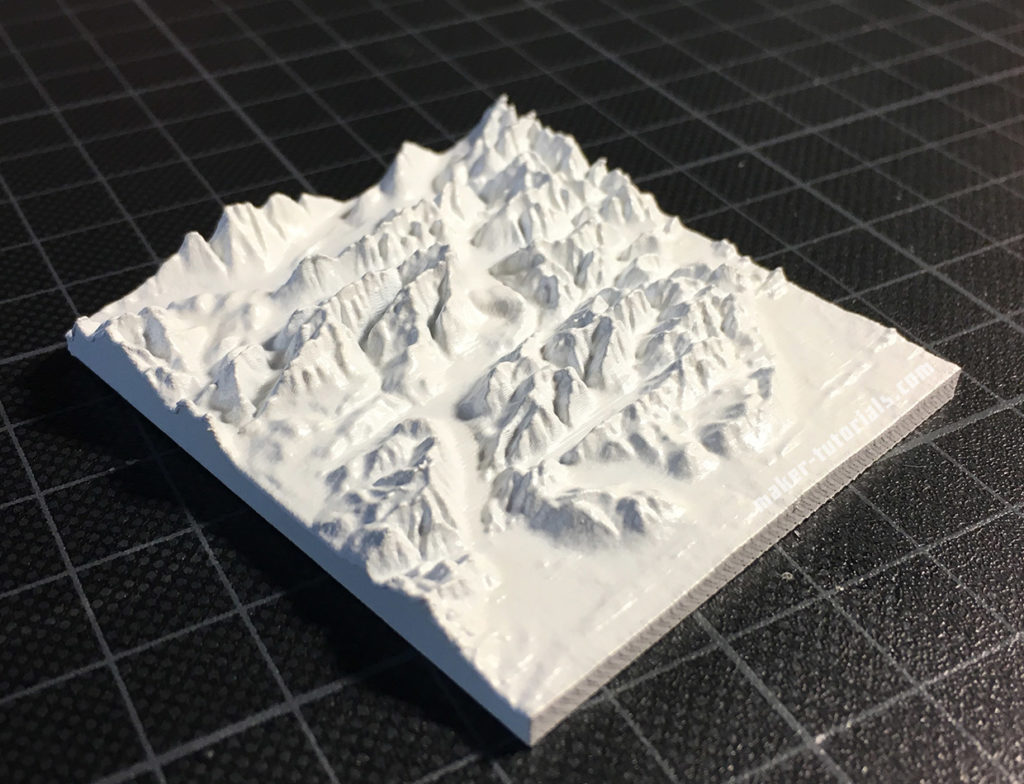
3D model with a primer layer and a layer of white.
…and to make it look more naturally I painted the 3D model with acrylic paint.


Sightline Maps appears to be strictly a cloud storage service for LiDAR data now. After signing up, I could not figure out how to pull up a map of the area for which I wanted to generate an STL. The only option I had was to upload a file, the first ten of which were free.